Tiramisu Loaf Cake

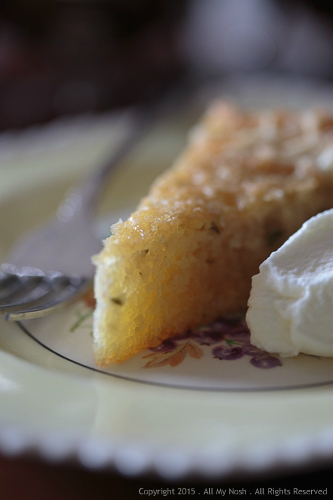
This dessert is a variation of the traditional version: Sponge cake soaked in espresso and filled with a creamy mascarpone cheese. Tiramisu is considered a semifreddo (a dessert served cold, but not frozen), said to have been invented in the town of Treviso in Northern Italy. Regardless of its origin, this is a cake that can be served on any occasion – whether you are happy, sad or in between.

Tiramisu Cake-1

Cake:

170g self-raising flour
170g sugar
115g unsalted butter (softened)
4 medium free-range eggs
1 level Tsp baking powder
4 Tbsp milk

Mascarpone Filling:

250ml double cream
75g sugar
4 eggs (yolks)
500g mascarpone cheese
5 Tbsp coffee liqueur (or sweet Marsala)
200ml espresso coffee
Raspberries and shaved chocolate, for decorating

Preheat the oven to 350F/180C.

In a food processor, put in all of the ingredients and mix together until smooth.

Pour the mixture into a loaf tin with a loaf tin lined with parchment paper.

Bake in the oven for 45 – 50 minutes or until golden brown. To test whether or not it is cooked, press your finger lightly in the middle, if it springs up it is cooked. Alternatively, put a skewer in the middle of the cake, if it comes out clean, the cake is cooked.

Gently lift the paper case out of the tin and leave on a wire rack to cool.

Once the mascarpone cream mixture is made, use a bread knife to cut the loaf cake in half along the cake into 2 horizontal layers.

Line an 11-inch-by-3 1/2-inch loaf pan (or any pan of similar size) with plastic wrap extending 2-inches over each side. Set aside while you mix up the mascarpone cream mixture.

Whip the cream just until stiff peaks form. Do not over beat.

Separate the egg yolks from the whites. In a large bowl beat the yolks with the sugar until very light and fluffy, about 10 minutes. Stir the mascarpone cheese into the egg-sugar mixture. Fold in the whipped cream.

Mix the espresso and the coffee liqueur (or sweet Marsala) in a shallow dish.

Take a layer of sponge cake and trim it so it is slightly smaller than the bottom surface of the pan. Trimming the cake will allow the mascarpone mixture to surround the cake layer.

Pour one-third of the filling over the bottom of the loaf pan. Brush the cake layer generously with the espresso mixture and place over the mascarpone cream mixture.

Repeat this step two more time, ending with a layer of mascarpone cream on top.

Fold the extending plastic wrap over the top of the tiramisu and refrigerate for at least 6-8 hours. If you can allow it to chill overnight, that is even better.

To unmold, fold back the plastic wrap and position a serving plate over the top of the tiramisu. Invert the tiramisu onto the plate and carefully lift off the loaf pan/mold. Gently remove the plastic wrap.

Decorate the top of the tiramisu cake with raspberries and shave chocolate.

Refrigerate until ready to serve.

This recipe can serve 6-8 people.

Note: The recipes on this site are my original creations or have been adapted from existing recipes with the original sources attributed. All recipes on this site have been tested at least once in my kitchen. Any and all errors are entirely mine.

Copyright© 2016 . All My Nosh . All Rights Reserved

Advertisement

Chocolate Raspberry Layer Cake

“Can I come back and see you sometime?”
“Long as you bring me some chocolate,” Gramma said, and smiled. “I’m partial to chocolate.”
“Gramma, you’re diabetic.”
“I’m old, girl. Gonna die of something. Might as well be chocolate.”

― Rachel Caine, The Dead Girls’ Dance

“For future reference, Harry, it is raspberry… although of course, if I were a Death Eater, I would have been sure to research my own jam preferences before impersonating myself.”

― J.K. Rowling, Harry Potter and the Half-Blood Prince

Chocolate Raspberry Cake-1

Cake:

285g all-purpose flour
1 Tsp baking powder
3/4 Tsp baking soda
1/4 Tsp salt
150g cup unsalted butter, softened
350g granulated sugar
2 eggs
85g unsweetened chocolate, melted and cooled
1 Tsp vanilla
295ml water
3 Tsp raspberry liqueur (or framboise)
125ml seedless raspberry jam
Fresh raspberries for decorating
Shaved chocolate for decorating

Chocolate Ganache Frosting:

455g high-quality bittersweet chocolate, finely chopped
550ml heavy cream
60ml corn syrup

Preheat oven to 350F/180C degrees. Line two 9×1-1/2-inch round cake pans with parchment paper to prevent sticking and set them aside.

Stir together flour, baking powder, baking soda, and salt in a mixing bowl. Set the dry ingredients aside.

Beat butter in a large mixing bowl with an electric mixer on medium to high speed for 30 seconds. Add sugar and beat until thoroughly mixed. Add eggs, one at a time, beating well after each addition. Beat in chocolate and vanilla. Add the dry mixture and the water alternately to beaten mixture, beating on low speed after each addition, just until combined. Pour batter into the prepared pans; spread evenly.

Bake in the preheated oven for 30 to 35 minutes or until a wooden toothpick inserted near centers comes out clean. Cool cake layers in pans on wire racks for 10 minutes. Remove cakes from pans. Cool cake layers thoroughly on racks.

For frosting, place chocolate in a large heatproof bowl. Bring cream and corn syrup just to a simmer over medium-high heat; pour mixture over chocolate. Let stand, without stirring, until chocolate begins to melt.

Beginning near the center and working outward, stir melted chocolate into cream until mixture is combined and smooth (do not over stir).

Refrigerate, stirring every 5 minutes, until frosting just barely begins to hold its shape and is slightly lighter in colour.

Place one cake layer, cut side up, on serving plate; spread with half of the raspberry jam. Top with second cake layer, cut side down. Spread with about 150ml chocolate ganache frosting.

Place another cake layer, cut side up, on top of frosting; spread with remaining jam. Top with last cake layer, cut side down.

Frost top and sides with all but 150ml of the remaining frosting. Pipe remaining frosting on top of cake. Garnish with raspberries and shaved chocolate.

This recipe can serve 8 people.

Note: The recipes on this site are my original creations or have been adapted from existing recipes with the original sources attributed. All recipes on this site have been tested at least once in my kitchen. Any and all errors are entirely mine.

Copyright© 2016 . All My Nosh . All Rights Reserved

Orange and Cranberry Upside Down Cake

This cake is a great way to showcase cranberries. It pairs sweet and sticky caramelized cranberries and orange marmalade with a moist and buttery cake. Crème Anglaise or sweetened whipped cream is a perfect accompaniment to this mildly tart dessert.

Orange and Cranberry Upside Down Cake-3

Topping:

40 grams unsalted butter, cubed
135grams packed light brown sugar
275 grams fresh or frozen cranberries
20 grams orange marmalade

Cake:

175 grams all-purpose flour
50 grams coarse grind cornmeal
1 1/2 teaspoon baking powder
1/4 teaspoon salt
120 grams unsalted butter, cubed, at room temperature
150 grams granulated sugar
Grated zest of two (2) large oranges
2 large eggs, at room temperature
1 teaspoon vanilla extract
125 milliliters whole milk, at room temperature

Melt the 4 tablespoons of butter, the brown sugar and orange marmalade together in a pan, stirring frequently, until the sugar is moistened and liquefied. When the mixture starts to bubble, remove from heat and set the pan aside to cool.

Preheat the oven to 350°F.

Spread the brown sugar, butter and marmalade mixture evenly over the bottom of a 9-inch cake pan; arrange cranberries on top.

With an electric mixer (or by hand), cream remaining butter and granulated sugar until light and fluffy. Add the eggs one at a time, vanilla and orange zest; beat until well combined.

In another bowl, whisk together flour, baking powder, and salt. With mixer on low speed, add flour mixture to butter mixture in three batches, alternating with the milk, until well combined.

Spread the batter over cranberries in pan in four mounds, and use a spatula to spread the batter evenly over the cranberries.

Place pan on a baking sheet; bake cake until a toothpick inserted in the center comes out clean, 45-50 minutes. Let the cake cool on a wire rack for 20 minutes.

Run a knife around edge of cake. Place a serving platter overturned on top of the cake pan, flip the two over simultaneously, until the cake releases from the pan onto the platter.

This cake is best served shortly after baking, while it’s still warm or at room temperature.

This recipe can serve 6-8 people.

Note: The recipes on this site are my original creations or have been adapted from existing recipes with the original sources attributed. All recipes on this site have been tested at least once in my kitchen. Any and all errors are entirely mine.

Copyright© 2015 . All My Nosh . All Rights Reserved

Lemon Thyme and Lavender Almond Cake

Happy summer! I haven’t written in a while because I haven’t tried any new recipes for a while. So restarting the blog with a cake is something I can definitely get behind. This Lemon Thyme and Lavender Almond Cake is also a nice way to start the summer, with a light lemon thyme flavour and the perfectly moist texture that made each bite a good reason to savour a sunny summer day.

Lemon Thyme and Lavender Almond Cake

Cake:

4 large eggs
135 grams ground almond
110 grams granulated sugar
3 tablespoons extra virgin olive oil
2 tablespoons lemon thyme
½ teaspoon lemon zest
½ teaspoon baking power
A pinch of salt
Flaked almonds

Syrup:

3-4 sprigs of culinary lavender
100g granulated sugar

Preheat the oven to 325°F. Place a round of parchment paper on the bottom of an 8-inch springform pan, and grease it and the sides of the pan with butter or cooking spray.

With an electric mixer with a whisk attachment, beat the eggs and sugar until the mixture is light, fluffy and have at least tripled in volume. Add in the olive oil while continuing to whisk.

In a separate bowl, whisk together the ground almond, lemon thyme, lemon zest and baking powder. Add the flour mixture to the mixture and fold until well mixed but make sure not to retain the air.

Pour the batter into the prepared springform pan and sprinkle the flaked almonds. Place the pan in the oven. Bake for 35-40 minutes.

While the cake is cooking, make the syrup. Place all the ingredients in a saucepan, along with 50ml of water.

Place the saucepan on the stove, and bring to the boil, stirring to dissolve the sugar. Boil for 3–4 minutes until ever so slightly thickened, then remove from the heat and discard the lavender sprigs.

Remove the cake pan from the oven and let cool for 10 minutes. Run a sharp knife around the edge of the cake helping it to separate from the side of the pan.

Reheat the syrup and pour over the cake, then leave the cake to cool down completely.

Release the springform pan sides, and gently move the cake to a serving plate.

This recipe can serve 6-8 people.

Note: The recipes on this site are my original creations or have been adapted from existing recipes with the original sources attributed. All recipes on this site have been tested at least once in my kitchen. Any and all errors are entirely mine.

Copyright© 2015 . All My Nosh . All Rights Reserved

Meyer Lemon-Cranberry Bundt Cake

Tangy cranberries and fragrant and bold Meyer lemons add refreshing qualities to this moist cake. Meyer lemon fruits have a sweeter, less acidic flavour than the more common supermarket lemon varieties. As the cake bakes, the cranberries are transformed into a sweet-tart compote-like texture. Ideal for brunch or afternoon coffee or tea.

Lemon Cranberry Bundt Cake_AMN

Ingredients:

12 Tbs (1 1/2 sticks) unsalted butter (at room temperature) plus some for greasing the pan(s)
2 cups fresh (or frozen) cranberries
2 1/2 cups all-purpose flour
2 1/2 tsp. baking powder
1/2 tsp. baking soda
1 tsp. salt
1 1/2 cups granulated sugar
2 Meyer lemons
3/4 cup buttermilk
1 tsp. pure vanilla extract
3 eggs
Confectioner’s sugar, for dusting

Directions:

Preheat an oven to 350°F. Grease a 12-cup Bundt pan or 12 mini Bundt pans with butter.

In a bowl, whisk together the flour, baking powder, baking soda and salt. Add the granulated sugar to the bowl of a stand mixer. Finely grate the zest from the Meyer lemons over the sugar and mix briefly.

Squeeze the juice from the Meyer lemons. In a cup, combine 4 Tbs. of the lemon juice, the buttermilk and vanilla.

Add the butter to the lemon zest–sugar mixture and beat on medium-high speed until light and fluffy, for about 1 to 2 minutes. Beat in the eggs one at a time, scraping the sides of the bowl after each addition. Reduce the mixer speed to low and add the dry ingredients in 3 batches, alternating with the buttermilk mixture in 2 batches. Scrape down the sides of the bowl and beat again, raise the mixer speed to medium-high and beat for 1 minute to aerate the batter. Fold in cranberries.

Scrape the batter into the prepared Bundt pan or mini Bundt pans. Spread the batter and smooth the top. Bake until the cake tester inserted into the center comes out clean, 35 to 40 minutes (Note: if mini Bundt pans are used, 20-25 minutes). Let cool in the pan(s) for 5 minutes, then invert the cake(s) onto a wire rack and let cool completely.

Once the cake is cool, dust with confectioner’s sugar just before serving.

This cake can easily serve 12 people.

Note: The recipes on this site are my original creations or have been adapted from existing recipes with the original sources attributed. All recipes on this site have been tested at least once in my kitchen. Any and all errors are entirely mine.

Copyright© 2014 . All My Nosh . All Rights Reserved